
How to Create and Publish Your First Android Library
Sooner or later every Android developer accumulates a fair amount of ready-made solutions and decides that it would be great to share them with the rest of the world. Unfortunately, most of us never get down to it since every solution should be turned into a separate library and put into a separate open repository. Plus, some tend to think that it’s all too complicated to even bother. Here I’d like to bust this myth since with Gradle coming into Android stack sharing your library with the world is much easier than it used to be.
Using BottomTabLayout
Of course, the first step is to write your own library. In this example I will be using BottomTabLayout. This library allows you to add a bottom TabLayout that came from the iOS realm.
1. A set of tabs is specified using XML file of menu resources. For example:
<?xml version="1.0" encoding="utf-8"?>
<menu xmlns:android="http://schemas.android.com/apk/res/android">
    <item
        android:id="@+id/menu_button1"
        android:icon="@drawable/tab_button1_selector"
        android:title="Button1" />

    <item
        android:id="@+id/menu_button2"
        android:icon="@drawable/tab_button1_selector"
        android:title="Button2" />

    <item
        android:id="@+id/menu_button3"
        android:icon="@drawable/tab_button1_selector"
        android:title="Button3" />
</menu>
2. In the code above icon property is a selector resource we create in drawable:
<?xml version="1.0" encoding="utf-8"?>
<selector xmlns:android="http://schemas.android.com/apk/res/android">
    <item android:drawable="@drawable/ic_button1_dark" android:state_pressed="true" /> <!-- pressed -->
    <item android:drawable="@drawable/ic_button1_dark" android:state_selected="true" /> <!-- selected -->
    <item android:drawable="@drawable/ic_button1" /> <!-- default -->
</selector>
state_selected and default states are mandatory here since we need to highlight a selected tab.
3. Let’s create a selector for text:
<?xml version="1.0" encoding="utf-8"?>
<selector xmlns:android="http://schemas.android.com/apk/res/android">
    <item android:color="@color/black" android:state_pressed="true" /> <!-- pressed -->
    <item android:color="@color/black" android:state_selected="true" /> <!-- selected -->
    <item android:color="@color/white" /> <!-- default -->
</selector>
4. Now create a style for text:
<style name="TabButtonTextStyle" parent="android:Widget.Button">
        <item name="android:textSize">12sp</item>
        <item name="android:textColor">@drawable/tab_button_text_selector</item>
</style>
5. Add BottomTabLayout to Activity markup:
<?xml version="1.0" encoding="utf-8"?>
<RelativeLayout xmlns:android="http://schemas.android.com/apk/res/android"
    xmlns:tools="http://schemas.android.com/tools"
    android:layout_width="match_parent"
    android:layout_height="match_parent"
    tools:context="com.stfalcon.bottomtablayout_sample.MainActivity">

    <FrameLayout
        android:id="@+id/container"
        android:layout_width="match_parent"
        android:layout_height="match_parent"
        android:layout_above="@+id/bottomTabLayout" />

    <com.stfalcon.bottomtablayout.BottomTabLayout
        android:id="@+id/bottomTabLayout"
        android:layout_width="match_parent"
        android:layout_height="56dp"
        android:layout_alignParentBottom="true"
        android:background="@color/dark" />
</RelativeLayout>
6. Set activity in class::
@Override
    protected void onCreate(Bundle savedInstanceState) {
        super.onCreate(savedInstanceState);
        setContentView(R.layout.activity_main);
        container = R.id.container; //Container for fragments
        //Setup button tab layout
        bottomTabLayout = (BottomTabLayout) findViewById(R.id.bottomTabLayout);
        //set button text style
        bottomTabLayout.setButtonTextStyle(R.style.TextGray16);
        // set buttons from menu resource
        bottomTabLayout.setItems(R.menu.menu_bottom_layout);
        //set on selected tab listener.
        bottomTabLayout.setListener(new BottomTabLayout.OnItemSelectedListener() {
            @Override
            public void onItemSelected(int id) {
                switchFragment(id);
            }
        });
        //set button that will be select on start activity
        bottomTabLayout.setSelectedTab(R.id.menu_button1);
    }
7. In our example when the tab is switched a fragment in the container changes:
**
     * Show fragment in container
     * @param id Menu item res id
     */
    public void switchFragment(int id) {
        Fragment fragment = null;
        switch (id) {
            case R.id.menu_button1:
                fragment = ColoredFragment.newInstance(R.color.blue, "Fragment 1");
                break;
            case R.id.menu_button2:
                fragment = ColoredFragment.newInstance(R.color.green, "Fragment 2");
                break;
            case R.id.menu_button3:
                fragment = ColoredFragment.newInstance(R.color.pink, "Fragment 3");
                break;
            case R.id.menu_button4:
                fragment = ColoredFragment.newInstance(R.color.blueDark, "Fragment 4");
                break;
            case R.id.menu_button5:
                fragment = ColoredFragment.newInstance(R.color.white, "Fragment 5");
                break;
        }
        if (fragment != null) {
            FragmentTransaction transaction = getSupportFragmentManager().beginTransaction();
            transaction.replace(container, fragment);
            transaction.commit();
        }
    }
We’re done, now it’s time to publish the library. Visit our GitHub to take a closer look at BottomTabLayout.
Publishing your Android library
Now I will tell you how having something similar you can share it with the world. We’ll start with creating a module, then upload it to GitHub and make public using Bintray.
Creating a module in Android Studio
1. Create a project in Android Studio. For your convenience rename app module into sample. It will contain your library usage example.
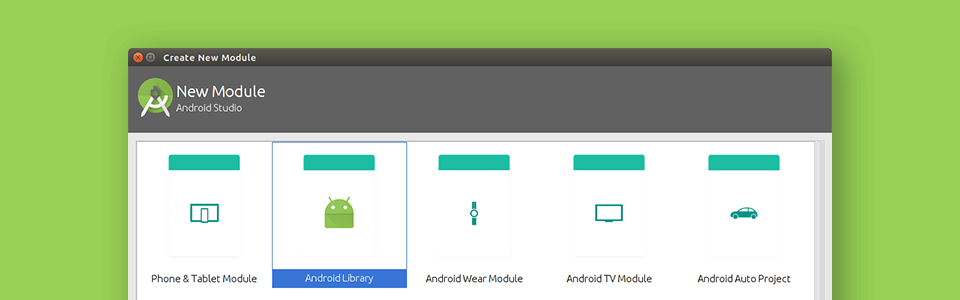
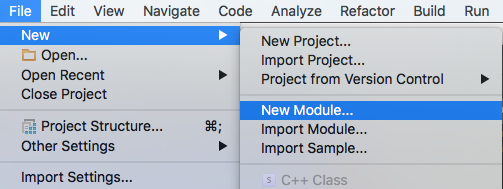
2. Create a new module:
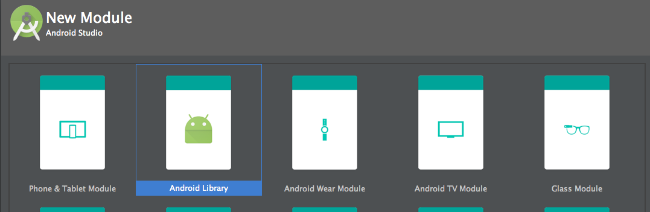
3. Choose Android Library type:
4. Enter a name — I will be using bottomtablayout.
5. Now settings.gradle should look like this:
include ':sample', ':bottomtablayout'
6. In the sample module add a dependency into build.gradle:
compile project(':bottomtablayout')
It is a temporary solution since currently our library is local.
7. Now you can write your own library (or move an existing code into it) and test it in a sample module.
8. When your library is ready, upload it to your GitHub account.
9. Write a README.md tutorial.
Adding library to Bintray
1. If the library is ready, it’s time to show it to the whole world! Get yourself a Bintray account.
2. Add a dependency into a build.gradle file of the project:
dependencies {
   ...
   classpath 'com.novoda:bintray-release:0.3.4'
}
3. In build.gradle file of library module (bottomtablayout in our case) apply a plugin:
apply plugin: 'com.novoda.bintray-release'
In the same file:
publish {
   groupId = 'com.github.stfalcon'
   artifactId = 'contentmanager'
   publishVersion = '0.1.1'
   desc = 'Library that helps a few lines of code to get pictures and video from the android file system, or ures cloud, as well as the camera device.'
   licences = ['Apache-2.0']
   uploadName='ContentManager'
   website = 'https://github.com/stfalcon-studio/ContentManager.git'
}
Where:
groupId— a package (can be different from the package of the module). I recommend to namegroupIdas follows:com.github.<username of your github account>since when you log in to upload your library to Maven Central you’ve got to be the owner of the domain used in the name groupId.artifactId— module name.publishVersion— version of publication.desc— library description.licences— licence.uploadName— library name.website— link to project GitHub.
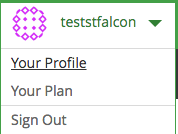
4. Now you need an API Key of your Bintray account. Go to your Bintray profile page:
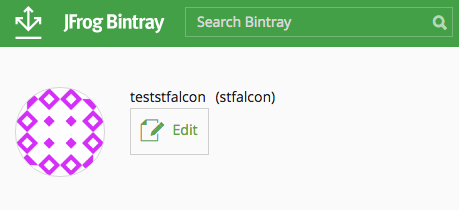
5. Find Edit button and click it:
6. Now go to API Key:
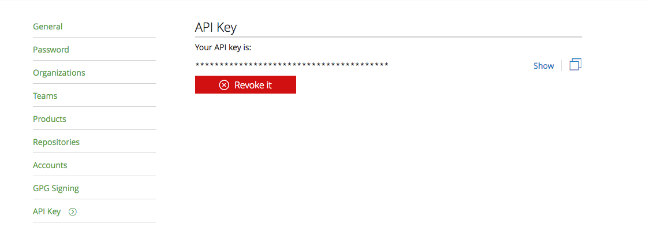
7. Put your key into a safe place.
8. Open Android Studio terminal and run:
gradlew clean build bintrayUpload -PbintrayUser=<юзернейм на bintray> -PbintrayKey=<api ключ с bintray> -PdryRun=false
9. Wait for library to be assembled and uploaded to server.
10. Now go to Bintray website and find a page of your newly added library.
11. Currently if you want to use a library you’ve got to add a link to the repo into build.gradle project file:
repositories {
    maven {
        url  "http://dl.bintray.com/<username>/maven"
    }
}
But can we simplify the last step somehow? Sure, we can!
Adding Android library to jCenter
Recently jCenter became a default Android repository (previously Maven Central was used). Still, adding your library into jCenter is very simple.
1. On your library page click add to jCenter and send a query for adding your library. Within 24 hours your library will be added to jCenter and you will get an email notification.
2. Now you can connect your library via build.gradle of the module by adding a respective dependency:
compile 'com.github.stfalcon:contentmanager:0.1.1'
Conclusion
Congratulations! Now your library is out and you’re ready to show it to your friends, share with the development community and watch it earn you GitHub stars and forks.
UPD: Check out a new article on our Android libraries!
Need MVP development, iOS and Android apps or prototyping? Check out our portfolio and make an order today!