

Software engineers often debate whether to use monolithic architectures or microservices. Choosing proper architectural patterns is crucial for building scalable, maintainable, and efficient software systems. Microservices are better for scalable evolving applications, but many developers find monolithic structures easier to create initially. The right choice depends on your operational needs, the skills of your team, and your goals for future success.
We will look at the key differences between monolithic and microservices to help you understand their monolith vs microservices pros and cons. We will identify when monolithic structures are most effective and when microservices provide better benefits. This article also offers practical guidelines for migrating and examples of launching projects to help you choose the proper development structure for your project needs.
Through our experience, we have managed the migration of numerous businesses toward scalable microservices-based solutions that consistently enhance performance quality and maintenance capabilities. Stfalcon’s expertise in custom software development guides organizations through decisions between new project launches or transitional choices.
Monolithic Architecture: Pros and Cons
Traditional software development follows a monolithic approach, merging every component into one unified application. Projects with defined scope requirements, small user reach, and restrictive resources find the monolithic model especially beneficial. Many companies choose monolithic architecture instead of microservices because it delivers quick deployment and minimal complexity for their projects. Let’s analyze monolith pros and cons points.
Advantages of Monolithic
- Simplicity in development. By following a monolithic development approach, organizations create unified applications that become simpler to build and more straightforward to assess and release to production. Developers can handle a single codebase, thereby minimizing initial development complexity.
- Easier debugging and testing. Testing and debugging become straightforward because all application components are part of the same app unit. The single runtime environment gives developers access to trace issues apart from enabling them to bypass considerations about service communication.
- Performance efficiency. When applications run as a single unit, they do not need to make network calls between different services. This helps them perform better by removing the delay caused by network communication. Transferring data within the same process is faster than using traditional methods like HTTP or queues to send messages between different services.
- Simplified deployment. Wrapping deployment assets into a single package makes management easier. It simplifies updates and rollouts because there is no need to coordinate services.
- Better resource utilization. Monolithic applications optimize memory efficiency and reduce processing overhead by eliminating service management expenses as all components operate in a single executing process.
Disadvantages of Monolithic
- Scalability Limitations. The scalability of monolithic systems has limits because different parts of the application manage varying levels of operational demand. In an invite-only application model, fewer social interactions reduce the need for notifications, making alternative service components less useful. When scaling up monolithic systems, all application resources must be expanded together, regardless of their individual needs.
- Deployment Bottlenecks. One centralized codebase forces organizations to perform complete application redeployment whenever they make changes. Continuous deployment becomes more challenging when availability risks increase because of more extended application downtimes.
- Technology Lock-in. The application's exclusive technology-based structure leads to substantial obstacles regarding adopting new coding frameworks or APIs inside system sections. When a PHP-based monolithic application implements Python for its new AI-based recommendation engine, the system needs thorough structural modifications before the integration succeeds.
- Longer build and startup times. Building time along with the startup sequence lengthens significantly as monolithic applications expand in scale. Huge applications have extended compilation times in addition to prolonged startup times. This reduces productivity throughout development phases and post-deployment periods.
- Complex maintenance and updates. Large monolithic systems suffer from complex maintenance challenges alongside costly updates while their codebase expands. When multiple work teams handle different program features, they must collaborate closely for change implementation, which creates a heightened danger of unintended consequences.
- Limited fault isolation. One individual flaw within a monolithic application will trigger the shutdown of the entire system. A single problem affecting a private social network's messaging feature can cause a complete shutdown across its entire network.
Microservices Architecture: Pros and Cons
Microservices architecture enables compatibility and scalability by dividing applications into separate independently deployable services. This approach gives users better scalability, fault isolation, and technology flexibility. It also creates complications through enhanced complexity, bringing more significant operational expenses and complicating debugging processes. However, what are the more detailed microservices' pros and cons? We are ready to tell you.
Advantages of Microservices
- Scalability. Single components within microservice architecture can expand or shrink autonomously from other elements. High-efficiency resource utilization results when messaging features receive loads of traffic because you can adjust their capacity independently from other services.
- Fault isolation. Each microservice function is scaled independently within an ecosystem because it does not rely on other components to deliver its functionality. This contrasts with monolithic systems because one nonfunctional part can shut down the complete application. When one service fails, the rest of the application functions silently and without interruptions.
- Technology flexibility. One of the benefits of microservices is that teams can choose alternative technologies based on functionality needs to implement optimal solutions. A recommendation engine constructed using Python exists independently from the core Node.js application infrastructure.
- Faster development and deployment. Each microservice operates independently of other services, enabling separate development activities per service. Systems with continuous deployment features allow teams to deploy individual updates throughout the application without conducting full application redeployments.
- Better team autonomy. Microservices allow individual development teams to take ownership of their services. This improves productivity and reduces dependencies between teams. Complex development projects that require extensive development teams benefit significantly from this approach.
Disadvantages of Microservices
- Increased complexity. Dependency issues appear alongside management difficulties and operations intricacies that microservices create. Teams face problems while aiming to maintain proper connections between different services and preserve consistent data flow.
- Higher operational costs. When deploying multiple services, operational expenses increase. These services need better infrastructure support and more monitoring and maintenance. Individually, microservice requires its own data systems, deployment setup, and specific security measures, which raises costs.
- Networking overhead. Applications that use microservices to share data need to communicate over a network. This can lead to delays and the chance of network failures. Service-to-service communication optimization remains one of the essential elements for performance maintenance.
- Data management challenges. This software architecture that uses a single database presents challenges since microservices need distributed methods to manage data. Maintaining data consistency and cross-service transactional operations presents steep challenges to system administrators.
- Difficult debugging and testing. The process of troubleshooting distributed systems proves more challenging than standard monolithic programs. Log collection requires data extraction from several services, increasing the difficulty of problem identification.
How to Choose the Right Architecture for Your Business?
Selecting monolithic vs microservices architecture is vital to determine your project's performance. Your architecture design must match your business logic while aligning with project deadlines, available funds, and predictable organizational expansion across multiple periods. Here are some key factors to consider when deciding between microservices and a monolithic architecture:
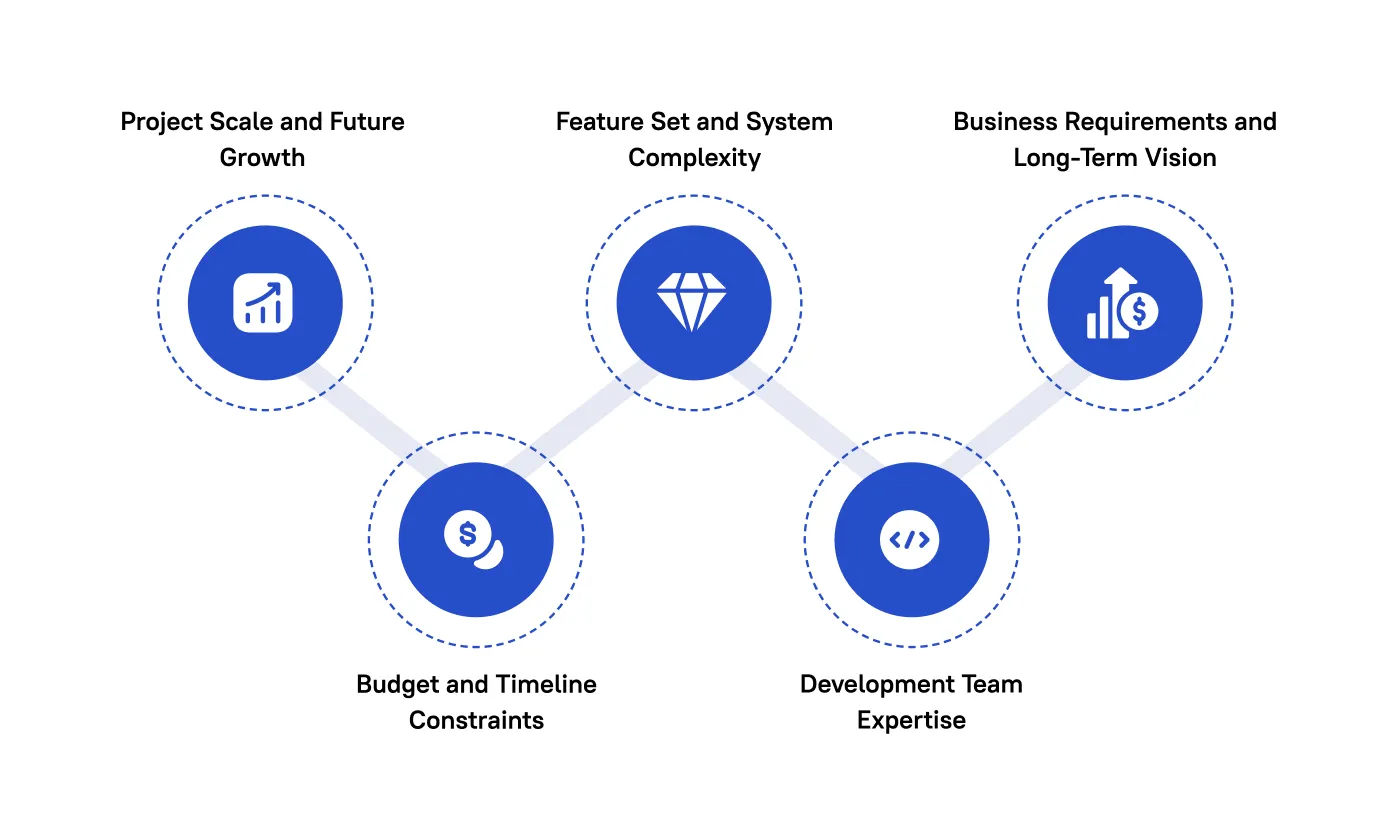
1. Project Scale and Future Growth
One of the first questions is: Does your project encompass what size scope and hold what development trajectory?
The monolithic architecture offers an appropriate solution when you aim for a private social network that targets fewer than 1000 users. Small applications benefit most from quick implementation with monolithic systems because these systems provide easier maintenance and deployment.
Want a web app that does more?
Let's build a solution that's smart, sleek, and powerful.
Alina
Client Manager

There are more pros and cons of microservices for cases requiring extensive growth potential, complex functionality, and ongoing scalability needs. Using multiple scalable microservice modules allows different application sections to handle streaming traffic independently, which lets you grow more adaptable and expand functionality in the future.
2. Budget and Timeline Constraints
Shortages in financial resources and time availability demand a thorough analysis of the absolute need for the advanced features of microservices architecture.
Due to its limited budget and rushed two-month deadline, the private social network project would benefit from monolithic architecture. Because deployment and development processes of monolithic frameworks tend to move swiftly, developers can achieve time-sensitive goals with their teams while avoiding cost escalations.
A microservices-based solution demands both long development time and extensive initial infrastructure spending. Operational restrictions make the approach impractical when implementing systems.
3. Feature Set and System Complexity
Develop your application features alongside directory needs. Implementing a monolithic architecture proves suitable when applications maintain simplicity beyond demanding intricate systemic connections. The social network application from the previous case analysis included only fundamental features that required messaging and user interface functions. A monolithic design should remain for such limited features because microservices would only add unnecessary architectural difficulty.
Microservices will work better than a monolithic system if your application demands third-party integrations, multiple sophisticated workflow management, and extensive user data requirements. The division of application logic into small independent deployments under the microservices model helps improve system operation efficiency and maintenance stability during scaling.
4. Development Team Expertise
Your developers' technological expertise is a key determinant for picking between monolithic and microservices architectures.
Microservices architecture is more appealing to development teams with expertise in microservices and their associated deployment infrastructure (containers and orchestration tools). Implementing microservices introduces new development challenges to teams previously working with monolithic systems, reducing their overall development speed.
Before creating a microservice application, organizations must determine their ability to control the additional structural complexity. When managing technical resources with unclear plans, a simpler structure built with monolithic elements represents the most straightforward option.
5. Business Requirements and Long-Term Vision
Your architecture must embrace business targets in addition to your organization's persistent vision. Business owners should invest in microservices from the beginning because they project their platform will develop into advanced growing capabilities even if their current project is limited.
The monolithic approach suits your business requirements if you need swift market entry, simplicity, and cost-effective solutions.
When to Choose Microservices Over Monolith
Business needs and technical requirements usually determine whether organizations select microservices architecture instead of monoliths. Relatively small and basic programs work best with monolithic solutions, but microservices are most valuable when projects grow larger and require increased flexibility and scalability. Here are some key scenarios where microservices are the right choice:
1. High Scalability Needs
The microservices design enables businesses handling diverse user loads and unpredictable task volumes to scale individual microservices outside their regular foundation. Your ability to distribute resources across areas of highest demand ensures excellent system performance reaches its peak usage periods.
Example: To optimize platform functionality, Netflix divided its system into three functionally independent units: streaming service, authentication service, and recommendation service. Service independence enables the company to meet worldwide user demand through flexible scaling while preserving high operational readiness and preventing system interruptions.
2. Complex, Multi-functional Systems
Applications characterized by multiple user access requirements and data aggregating functions benefit best from microservices architecture because this design technique divides core functions into manageable individual services. Different project teams concentrate on individual application parts in this method, which helps maintain control over increasing feature complexity.
Example: On their platform, Amazon decomposes its platform operations through microservices into specific components such as order fulfillment, payment processing, and inventory management. Through decoupled service operations, their decentralized system enables function optimization without impacting other platform components, which results in optimized platform-wide performance.
3. Frequent Deployment and Continuous Integration
Microservices enable rapid updates with constant deployments, enabling independent service maintenance within continuous integration frameworks. Quick implementations of new features and bug fixes leave the system intact, thus enabling better market response.
Example: Spotify independently delivers regular updates to its user profiles, playlists, and music discovery systems. Because of its modular design, Spotify successfully implements sequential updates and performs ongoing feature testing and proper resolution without impacting user engagement.
4. Team Independence and Collaboration
Microservices enable independent teamwork across application sections, accelerating development speed and enhancing operational efficiency. Separating teams allows them to work on their designated services while waiting for other processes to finish, accelerating both development periods and innovative projects.
Example: Uber separates its services between trip management and payment processing and driver management teams, which operate independently. Separate teams handle different services independently, while development becomes faster because individual service issues cannot affect other team artifacts.
5. Technology Diversity
Different services within your application are free to select optimal tools for their work, enabling both adaptable systems and peak operational efficiency. Other languages and databases require special IT attention, which this model helps address universally.
Example: The back-end services through inventory management at eBay run on Java, but Node.js enables real-time features for messaging and notifications. Through this fragmentation, eBay optimizes application performance at each stage of its application development while maintaining efficient development approaches that meet specific requirements.
6. Fault Isolation
Your system can function without interruption even if one service stops working, thus making it ideal for platforms that need regular high availability. A system-wide failure prevention method called fault isolation protects the entire application from single microservice trouble to build resilient systems.
Example: All job search functionality, networking capabilities, and direct messages exist within separate domains within LinkedIn's application structure. All services maintain uninterrupted operation even if the job search experience encounters problems because networking and messaging features operate independently, thus preserving LinkedIn's core functionality for users.
7. Long-term Growth
Microservices enable sustainable growth by providing your system with scalability features and a flexible structure, preventing extensive disruptions during development. Your business system will remain responsive through future enhancing operations by allowing microservices to adapt while your organization grows.
Example: The rising number of users prompted Airbnb to migrate to microservices. Airbnb achieved worldwide scalability and adaptation by partitioning its platform's functions into distinct service units for booking payments and search capabilities.
When to Migrate from Monolith to Microservices
Moving your company from a monolithic architecture to a microservices structure demands strategic planning, which involves mapping your operational goals and engineering capacity. Your organization should consider microservices migration when facing scaling complications, slow update releases, system downtime incidents, and poor infrastructure behavior. Below are key signs that indicate it might be time to transition:
Gowing Complexity and System Size
As applications expand, managing traditional monolithic systems becomes challenging. Breaking the system into smaller, independent parts, such as microservices, helps manage complexity. Twitter can be one of the most popular use cases as they switched from a monolithic structure to microservices to enhance performance and scalability.
Slow Deployment and Update Cycles
Monolithic architectures require complete redeployment for small changes, which slows development. Microservices allow independent operation and quick deployments. Walmart faced delays with a monolithic system but improved its release intervals by adopting microservices for individual updates.
Difficulty in Scaling Specific Components
In monolithic systems, you must scale the whole application, even when only specific components need it. Microservices enable flexible resource allocation, allowing teams to scale particular services as required. Uber benefited from this by adjusting system components based on demand.
Frequent Downtime or Performance Bottlenecks
Single-architecture systems can suffer from performance issues and downtime during high user traffic. Microservices isolate disruptions, allowing the rest of the system to function. Spotify, for instance, improved its performance by switching to microservices, which limited failures to individual services.
Inability to Adopt New Technologies or Scale Teams
Integrating new technologies can be difficult in monolithic systems. Microservices allow teams to work independently with different technologies. eBay transitioned to microservices, enabling them to use any tech stack and improving development speed.
Increased Development Time and Technical Debt
Monolithic structures accumulate technical debt over time, delaying projects. Microservices reduce complexity, allowing teams to focus on specific features. By the way, Instagram's shift to microservices facilitated quicker project completion and simpler system management.
Conclusion: Monolith or Microservices — Which Should You Choose?
Choosing between monolithic and microservices architecture is crucial for your business’s software development in the long run. Each approach has its strengths, and the best choice depends on your system size, required features, and available development resources. Monolithic architecture works well for smaller and more straightforward applications, while microservices offer better scalability, flexibility, and fault isolation, making them suitable for more complex systems. Sometimes, using a hybrid architecture is a smart choice. It combines the ease of a single unit (monolith) with the ability to grow (scalability) of smaller, separate services (microservices) for key parts.
If you aim to scale operations, speed up your system, and encourage innovation, consider switching to a microservices architecture. Assess your current system to identify specific problems that microservices can address. The experts at Stfalcon can help your business transition smoothly to a microservices architecture while maximizing operational efficiency.
The best architectural solutions await your business needs, so contact our team for a comprehensive free consultation!
FAQs: Monolith vs Microservices Architecture
Can I migrate from a monolithic architecture to microservices?
Transitioning from monolithic architecture to microservices offers significant benefits for scaling system development. This process involves breaking down monolithic codebases into independent services, improving scalability, flexible functionality, and easier maintenance. Migrate your operations gradually to microservices as your business evolves.
How do microservices handle new features compared to monolithic software?
Microservices enable modular service development, allowing each unit to be developed and deployed independently. Every microservice focuses on a specific feature, facilitating faster development cycles with minimal disruption to the system. Their modular structure allows teams to add new features more quickly than monolithic frameworks, supporting rapid market delivery.
What challenges might I face when migrating to microservices?
Transitioning to microservices offers significant benefits but presents challenges, such as increased service complexity, the need for new skills and technologies, and difficulties monitoring and troubleshooting any distributed system. Careful planning is essential for migration, as it can increase both timeframes and costs. Successful implementation relies on systematic deployment and investments in tools and team expertise to manage the new architecture effectively.