

Минулого року на WWDC 2019 Apple оголосила про iOS 13, watchOS 6, macOS X Catalina та багато іншого. Досі про всі ці новинки сказано чимало. Багато людей вважають, що останнє WWDC стало таким же значним кроком уперед, як і те, на якому був представлений Swift.
На мою думку, найбільші зміни стосуються watchOS. Погодьмося, SwiftUI доступний лише з iOS 13, watchOS 6 та macOS Catalina, і більшість розробників хотіли б зберегти сумісність з попередніми версіями, принаймні з однією чи двома. Більше того, SwiftUI ще не зовсім зрілий. Існує чимало проблем під час розробки, а також досить обмежена гнучкість нового фреймворку. Це означає, що найближчим часом ми не побачимо багато додатків SwiftUI для iOS чи macOS.
Проте, SwiftUI просто блискучий для watchOS. По-перше, зазвичай нам не потрібна велика функціональність на годиннику. Крім того, рівень налаштування виглядів в WatchKit не такий високий, як в UIKit, тому перехід на SwiftUI не є таким болісним. Нарешті, навіть зараз (листопад 2019) в AppStore для watchOS дуже мало додатків, що означає, що є достатньо місця для реалізації ваших ідей.
У цій статті я хотів би швидко розглянути дві основні функції нового оновлення watchOS і створити окремий додаток watchOS за допомогою SwiftUI.
Додаток
Apple Watch — це чудовий пристрій, який може відстежувати багато речей: дистанцію, яку ви проходите/бігаєте/плаваєте, частоту серцебиття, години стояння, навіть рівень звуку навколишнього середовища! Але як щодо відстеження чогось більш приємного, ніж спорт? Наприклад, телевізійних серіалів? Не жартую, іноді мені важко згадати, яка серія була останньою, і оскільки я дивлюся серіали на різних платформах, мені б хотілося мати сторонній додаток для цього. Більше того, іноді це просто життєво важливо пам'ятати, яка серія була останньою щоб уникнути спойлерів! :)
Отже, давайте спробуємо створити додаток SeriesTracker, який допоможе вам пам'ятати, на якому сезоні та епізоді ви залишили конкретний телевізійний серіал.
Розпочнемо з налаштування проекту. Необхідно створити новий проект в Xcode, вибравши Файл -
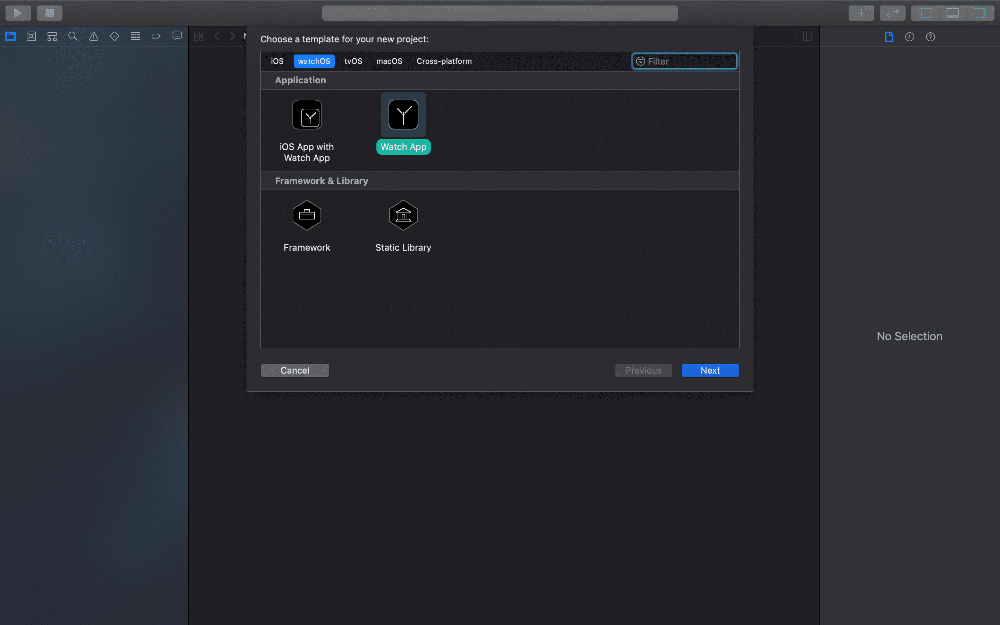
> Новий -> Проект, після чого переключіться на вкладку `watchOS` і виберіть `Watch App`.
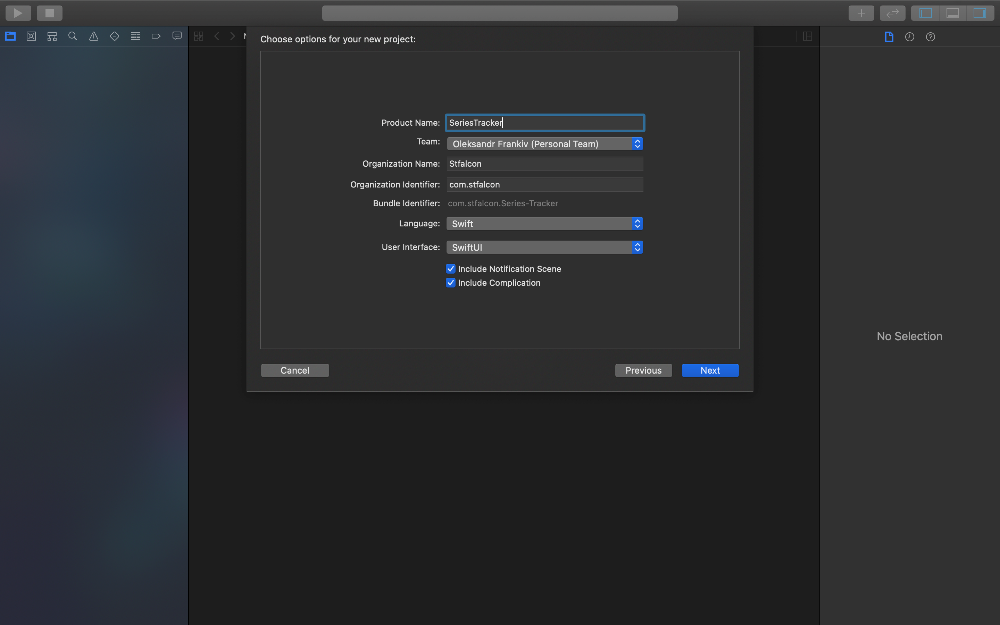
Далі важливо вибрати SwiftUI для інтерфейсу користувача в вікні налаштування проекту.
Тепер у нас є базова структура проекту. Давайте трохи її очистимо, розділивши всі файли на різні каталоги.
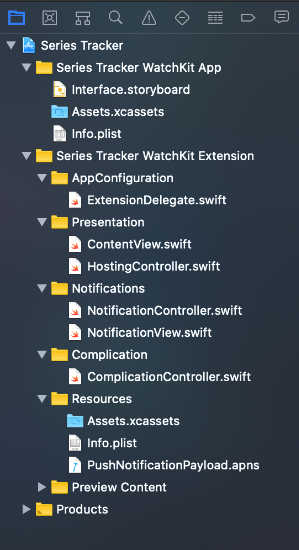
Нам поки не знадобляться сповіщення, ускладнення та ресурси в цій статті. Проте ми можемо використати Assets.xcassets, щоб додати кілька красивих значків застосунку або ускладнень :)
Давайте почнемо з усвідомлення того, що має вміти застосунок. Ми будемо зберігати та відображати список серіалів та деяку базову інформацію про них. Ми також надамо можливість оновлювати інформацію, видаляти серіали з застосунку та додавати нові.
Модель
struct Series: Identifiable, Codable, Equatable {
    let id= UUID().uuidString
    let name: String
    var seasonNumber: Double =1
    var episodeNumber: Double =1
    var finishedWatching =false}
По-перше, нам потрібно визначити модель.
Структура Series містить id, який також потрібен протоколу Identifiable, назву шоу, номери сезону та епізоду, а також логічне значення, що вказує, чи ми вже його переглянули. Протокол Codable потрібен для зберігання наших шоу у форматі json, а Identifiable буде незабаром пояснений, коли ми перейдемо до структури SwiftUI List.
final class DataStorage: ObservableObject {// MARK: - Singletonstatic let shared = DataStorage()// MARK: - Properties// Internal private let seriesPersistanceIdentifier ="com.stfalcon.series_tracker.series"// Data @Published var series:[Series]// MARK: - (Private) Init private init(){ let storedSeriesData = UserDefaults.standard.data(forKey: seriesPersistanceIdentifier) self.series = DataStorage.decodedFromJson(storedSeriesData) ?? exampleSeries ?? []}// MARK: - Private logic func saveAll(){ self.save(series, forKey: seriesPersistanceIdentifier)} private func save<t: codable>(_ data: T, forKey key: String){ let rawData = DataStorage.encodedJsonRepresentation(of: data) UserDefaults.standard.set(DataStorage.encodedJsonRepresentation(of: rawData), forKey: key)}// MARK: - Private static utils private static func encodedJsonRepresentation<t: codable>(of data: T)-> Data? {return try? JSONEncoder().encode(data)} private static func decodedFromJson<t: codable>(_ data: Data?)-> T? { guard let data = data else{returnnil}return try? JSONDecoder().decode(T.self, from: data)}}</t:></t:></t:>
Тепер ми повинні створити якийсь менеджер збереження — DataStorage.
Цей клас матиме `shared` синглтон. Ми будемо зберігати серіали в масиві та зберігати їх у налаштуваннях користувача. Звичайно, зазвичай це погана ідея зберігати велику кількість даних там. Однак для нашого прикладу цього достатньо.
Є дві незвичайні речі про DataStorage — ObservableObject та @Published. ObservableObject — це протокол, якому об'єкт має відповідати, щоб його можна було відстежувати в SwiftUI, а анотація @Published є обгорткою властивості, яка робить певну властивість об'єкта доступною для спостереження. Ми розглянемо, як це працює, пізніше в цій статті.
Давайте також додамо рядок коду до ExtensionDelegate, щоб зберігати наші дані в UserDefaults кожного разу, коли наш
func applicationWillResignActive(){
    DataStorage.shared.saveAll()}
застосунок стає неактивним.
Презентація
Тепер, коли ми завершили роботу з моделлю, давайте заглибимося в презентаційний шар. На даний момент у нас є HostingController та ContentView. Ми створимо наші власні вьюхи та зробимо одну з них підвьюхою контенту, а потім перейдемо до інших. Ми будемо використовувати HostingController як єдиний контролер в додатку і зробимо наш додаток чимось на зразок вью-базованого.
Почнемо створювати вьюхи з найатомарніших. Наш додаток поки що не використовуватиме жодного Інтернет-з'єднання, тому ми не зможемо завантажити жодних зображень для наших шоу. Проте, ми можемо
struct LetterImageView: View {// MARK: - Дані
    var letter: Character
    // MARK: - Вьюха
    var body: some View {
        ZStack {
            Rectangle()
                .size(CGSize(width:200, height:200))
                .foregroundColor(.gray)
            GeometryReader { geometry in
                Text(String(self.letter))
                    .font(Font.system(size: geometry.size.height /2))
                    .bold()}}
        .clipShape(Circle())}}struct LetterImageView_Previews: PreviewProvider {static var previews: some View {
        LetterImageView(letter:"A")}}
все ж створити вьюху-зразок з першою літерою назви шоу — LetterImageView.
Кожна SwiftUI View є структурою, що відповідає протоколу View. На відміну від UIKit, всі вьюхи є структурами в SwiftUI. Це призводить до меншої кількості проблем з неналежним використанням принципів ООП і допомагає уникнути помилок управління пам'яттю (наприклад, циклів утримання).
Нашій вьюсі потрібна лише одна збережена властивість. Це символ, який ми хочемо відобразити як заповнювач. Як і кожна View, наш LetterImageView повинен надавати обчислювану властивість `body`, яка містить всі вкладені вьюхи. Більшість вьюх SwiftUI має ініціалізатор, що має параметр замикання, куди ми поміщаємо всі вкладені вьюхи.
У цій конкретній вьюсі ми використовували ZStack, який використовується для накладення вьюх: сірий прямокутник фіксованого розміру та мітка. Окрім ZStack, SwiftUI також має HStack та VStack (які є горизонтальними та вертикальними стеками). Варто звернути увагу на те, що ми обгортаємо мітку всередині `GeometryReader`. Це зроблено для того, щоб підлаштувати шрифт мітки до розміру вьюхи в разі, якщо вся вьюха масштабується. Також зазначимо, що ми обрізаємо стек до форми кола. SwiftUI надає нам різноманітність форм, до яких ми можемо обрізати наші вьюхи.
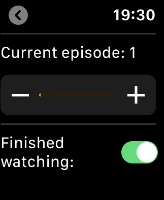
Text(self.currentSeries.finishedWatching ? "Закінчили перегляд":"В процесі перегляду")
                    .font(.subheadline)
                    .foregroundColor(self.currentSeries.finishedWatching ? .gray : .green)
Виглядає досить декларативно, чи не так? Звичайно, і це величезна перевага SwiftUI. Ще одна чудова річ у цьому фреймворку полягає в тому, що код тепер є єдиним джерелом істини, і немає жодної можливості, що будь-які конфігурації будуть переозначені в іншому місці, як це могло б статися при використанні Storyboards.
Ми також повинні звернути увагу на структуру LetterImageView_Preview. Вона використовується двигуном попереднього перегляду і повинна надавати всі змодельовані дані для вьюхи.
Тепер у нас є заповнювач.
// MARK: - Дані
@EnvironmentObject var store: DataStorage
var seriesId: String
var seriesIndex: Int {
    store.series.firstIndex(where:{ $0.id== seriesId })!}
var currentSeries: Series {
    store.series[seriesIndex]
Давайте створимо view, яка відображатиме всю інформацію про шоу — SeriesDetailedView. Тут нам знадобиться `storage` як @EnvironmentObject, `seriesId` як збережене поле. Нам також потрібні деякі утиліти, такі як обчислені `seriesIndex` і `currentSeries`.
@EnvironmentObject, а також @ObservableObject і @State — це обгортки для об'єктів, надані SwiftUI. Якщо будь-які з @Published значень цих об'єктів змінюються, зміни автоматично відстежуються фреймворком, що призводить до оновлення макета view і перезавантаження UI. Основна різниця між цими трьома анотаціями полягає в тому, що @EnvironmentObject зазвичай використовується для об'єктів, які спільні для всього додатку і надаються спеціальним методом `func environmentObject < B > (_ bindable: B) -> some View where B : ObservableObject` протоколу View; @ObservableObject використовується для об'єктів, які спільні між невеликою кількістю view і надаються через ініціалізатор View; @State використовується для об'єктів, які використовуються в контексті одного View і також надаються через ініціалізатор.
Тіло SeriesDetailView досить просте, тому давайте зосередимося лише на деяких функціях SwiftUI, які ще не були описані.
Оскільки весь UI написано в замиканнях, ми можемо легко використовувати умовні оператори для включення/виключення деяких view, а також зробити будь-які параметри конфігурації UI залежними від моделі. Це легко побачити в конфігурації мітки `В процесі`.
В залежності від того, чи закінчив користувач перегляд конкретного шоу, ми відображаємо різний текст на статусній мітці та задаємо колір тексту. Чудовий декларативний і досить зручний спосіб налаштування UI.
Наступним ми створимо view для редагування поточного сезону і епізоду шоу, а також властивості `finishedWatching`. Це означає, що нам потрібно якимось чином перейти на наступний екран. У SwiftUI є простий спосіб це зробити.
NavigationLink(destination:
    EditSeriesView(
        seriesId: seriesId
    ).environmentObject(self.store)){
    Text("Оновити")
Тут ми створюємо NavigationLinkView і надаємо view призначення, якою в даному випадку є EditSeriesView. Ми передаємо seriesId і середовище безпосередньо в параметрах функції. Ми використовуємо замикання для вказання, як NavigationLink має бути відображено. У цьому випадку це буде кнопка `Оновити`.
 var currentSeriesBinding: Binding<series> {
        $store.series[seriesIndex]}</series>
Хоча інтерфейс EditSeriesView дуже простий, є один важливий момент, який потрібно описати. Ми створимо ще одну утиліту у вигляді обчислювальної властивості. Binding використовується для посилання на об'єкт або структуру, яку ми хочемо оновити за допомогою UI Controls. Слід звернути увагу на те, що ми використовуємо спеціальний $-синтаксис, щоб створити Binding з нашого ObservableObject. Тепер, якщо ми передамо цей binding до Slider, він автоматично оновить конкретну серію в нашому EnvironmentObject, що, безумовно, оновить UI і зберігатиме його актуальним. Простими словами, як тільки користувач активує слайдер, текст мітки автоматично оновлюється.
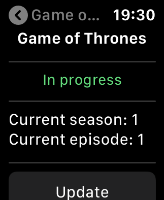
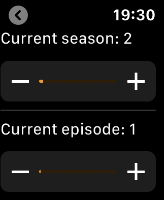
 Text("Поточний сезон: \(Int(currentSeries.seasonNumber))")
                Slider(value: currentSeriesBinding.seasonNumber,
                       in: minValue...maxValue,
                       step: step)
                    .accentColor(.orange)
Ось як це виглядає на пристрої.
Тепер час створити список усіх серій у додатку. SwiftUI List — це потужний аналог UITableViewController з UIKit. Це основний елемент у нашому SeriesListView. Пізніше ми зробимо цей вигляд основним виглядом нашого додатку, надаючи його як підвид ContentView.
Давайте зануримось трохи глибше в реалізацію цього вигляду. Тут ми надаємо @EnvironmentObject, який можна вважати певним джерелом даних у цьому конкретному випадку. Більше того, ми надаємо дві властивості @State. `showInProgressOnly` використовується для фільтрації шоу, які в даний момент не переглядаються користувачем. `newSeriesName` незабаром буде використовуватися для зберігання назви новоствореного шоу.
struct SeriesList: View {// MARK: - Data
    @EnvironmentObject var store: DataStorage
    @State var showInProgressOnly =true
    @State var newSeriesName =""// MARK: - View
    var body: some View {
        List {
            Toggle(isOn: $showInProgressOnly){
                Text("В процесі")}
            ForEach(store.series){ series inif!self.showInProgressOnly || !series.finishedWatching {
                    NavigationLink(
                        destination: SeriesDetailView(seriesId: series.id)
                            .environmentObject(self.store)){
                        SeriesRow(
                            seriesId: series.id).environmentObject(self.store)}}}}
        .navigationBarTitle("Мої серії")}}
Зазвичай нам не потрібно використовувати ForEach для виглядів у List. Передача джерела даних і замикання з вкладеними виглядами до ініціалізатора списку є достатньою, якщо у нас є лише динамічні клітини. У цьому випадку ми маємо обидва — статичну клітину з перемикачем, що контролює фільтрацію, та кількість динамічних клітин, що відображають шоу. Важливо підкреслити, що наше джерело даних (масив Series) є Identifiable, оскільки Series є Identifiable сам по собі. Це дозволяє List або ForEach відрізняти різні моделі і дає можливість працювати з повторно використовуваними виглядами. Якщо б Series не була Identifiable, нам довелося б надати додатковий параметр `id` і вказати #keyPath для первинного ключа об'єкта. Також приємно бачити, як легко ми можемо фільтрувати об'єкти за допомогою одного умовного висловлювання.
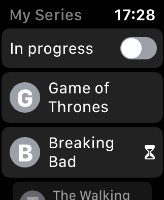
Ось як виглядає наш список на пристрої.
Тепер ми можемо відображати та змінювати наші шоу, давайте надамо користувачу можливість їх видаляти.
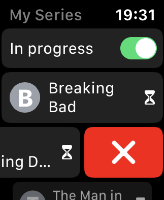
Для цього нам потрібно лише створити метод у нашому вигляді, який видаляє значення з джерела даних на основі IndexSet і вказати
.onDelete(perform: self.delete)
цю функцію в `onDelete` для елемента ForEach. Так, це так просто!
private func delete(at offsets: IndexSet){
    store.series.remove(atOffsets: offsets)}
TextField("Додати новий серіал", text: $newSeriesName, onCommit:{
                self.addNewSeries()})
Тепер давайте створимо поле для введення нового серіалу. Ми створюємо метод, який вставляє нове значення в джерело даних, та створюємо TextField, який змінює `newSeriesName` @State і викликає функцію `addNewSeries` при завершенні введення.
Тепер ми можемо додавати нові телевізійні серіали до нашого додатку.
Останнє, але не менш важливе, більшість виглядів SwiftUI є багаторазовими на всіх пристроях Apple (watch, iPhone, Mac), і це прекрасно, якщо ми хочемо розробити крос-платформний додаток.
Висновок
Хоча це правда, що SwiftUI набагато більше, ніж ці кілька речей, розглянутих у цій статті, цей маленький додаток є блискучим прикладом того, яким простим і зрозумілим став процес створення самостійного додатку для watchOS. Це справді виглядає як початок нової ери в розробці мобільного та носимого програмного забезпечення.
Повну версію SeriesTracker можна знайти в репозиторії.