
RxAnimated — це бібліотека для RxSwift/RxCocoa, випущена в 2017 році, яка все ще може бути корисною для реалізації анімацій. Вона забезпечує анімований інтерфейс для прив'язок у RxCocoa. Бібліотека постачається з кількома попередньо визначеними анімаціями для прив'язок та пропонує гнучкий механізм для додавання власних анімацій і використання їх під час прив'язки в RxCocoa.
Ця стаття призначена для тих, хто хоче почати працювати з RxAnimated. Якщо коротко, мета бібліотеки полягає в тому, щоб модифікувати код прив'язки, який існує певною мірою, щоб він додавав анімацію до користувацького інтерфейсу замість того, щоб вносити негайні зміни.
Можливості:
- Додавання простих вбудованих переходів до прив'язок, таких як переворот, зникнення та тик;
- Додавання власних анімацій у блоці для переходів;
- Розширення RxAnimated для підтримки нових одержувачів прив'язок у ваших власних класах;
- Розширення RxAnimated для підтримки нових власних анімацій.
Початок роботи
Щоб почати працювати з RxAnimated, просто додайте наступний рядок до вашого Podfile:
pod "RxAnimated"Я також додам, що RxAnimated базується на RxSwift 6. Ті, хто не знайомий з CocoaPods, повинні краще ознайомитися з посиланням.
Код прив'язки без анімації
Під час прив'язки значень до RxCocoa пишіть щось на зразок цього:
import RxCocoa
...
imageObservable
  .bind(to: imageView.rx.image)
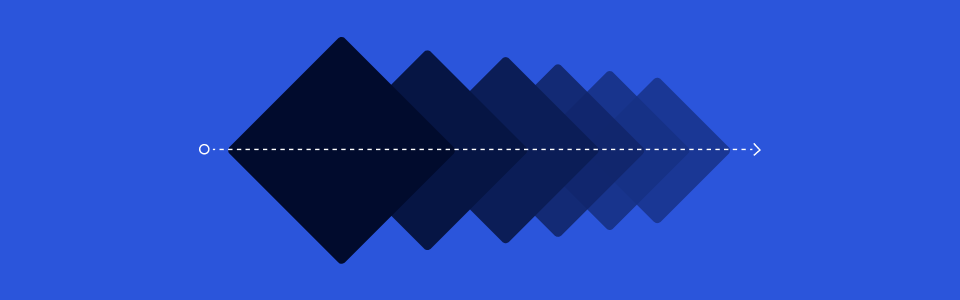
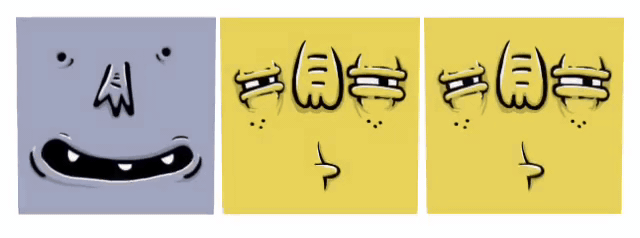
В результаті, коли нове значення в imageObservable отримується, UIImageView оновлюється. Це відбувається одразу, без жодного анімованого переходу, і користувачі побачать на екрані щось на зразок цього:
Код прив'язки з анімацією
З RxAnimated анімацію можна додати до прив'язки дуже просто, наприклад:
import RxCocoa
import RxAnimated
...
imageObservable
  .bind(animated: imageView.rx.animated.fade(duration:0.33).image)
З цією зміною прив'язка починає перехід щоразу, коли потрібно здійснити побічні ефекти, у цьому випадку — зміну зображення в UIImageView. Результат можна побачити на екрані:

Єдина різниця полягає в тому, що використовується bind (animated :) замість bind (to :) і animated.fade (duration: 0.33) (або одна з інших стандартних чи власних анімацій) вставляється між RX та властивістю, яку ви хочете використовувати, наприклад, UIImage, як у наведеному вище випадку.
Усі вбудовані анімації працюють на будь-якому елементі UIView, а також на певних властивостях, таких як UILabel.rx.text або UIImageView.rx.image.
Список анімацій
Нижче ви можете знайти список усіх стандартних властивостей для прив'язки анімацій та список самих анімацій.
Список властивостей для прив'язок анімацій:
- UIView.rx.animated...isHidden
- UIView.rx.animated...alpha
- UILabel.rx.animated...text
- UILabel.rx.animated...attributedText
- UIControl.rx.animated...isEnabled
- UIControl.rx.animated...isSelected
- UIButton.rx.animated...title
- UIButton.rx.animated...image
- UIButton.rx.animated...backgroundImage
- UIImageView.rx.animated...image
- NSLayoutConstraint.rx.animated...constant
- NSLayoutConstraint.rx.animated...isActive
Список вбудованих анімацій:
- UIView.rx.animated.fade(тривалість: TimeInterval)
- UIView.rx.animated.flip(FlipDirection, тривалість: TimeInterval)
- UIView.rx.animated.tick(FlipDirection, тривалість: TimeInterval)
- UIView.rx.animated.animation(тривалість: TimeInterval, animations: ()->Void)
- NSLayoutConstraint.rx.animated.layout(тривалість: TimeInterval)
Приклади
Спочатку створимо Observables, які будуть надсилати нам значення протягом певного часу, і ми покажемо анімації у відповідь на них.
private let timer = Observable<int>.timer(RxTimeInterval.seconds(0), period: RxTimeInterval.seconds(1), scheduler: MainScheduler.instance) private var isActiveTimer: Observable<bool> {return timer .scan(true){ acc, _ inreturn!acc }} private var imageTimer: Observable<uiimage> {return timer .scan("face1"){ _, count inreturn count %2==0 ? "face1":"face2"} .map { name inreturn UIImage(named: name)}} private var constraintTimer: Observable<cgfloat> {return timer .scan(0){ acc, _ inreturn acc ==0 ? 100:0}} private var timerHidden: Observable<bool> {return timer .scan(false){ _, count inreturn count %2==0 ? true:false}} private var timerAlpha: Observable<cgfloat> {return timer .scan(1){ acc, _ inreturn acc > 2 ? 1: acc +1} .map { CGFloat(1.0/ $0 )}} </cgfloat></bool></cgfloat></uiimage></bool></int>
А тепер подивимося, як виглядають різні анімації для різних властивостей додатку. UILabel.text + fade:
   timer
            .map {"Text + fade [\($0)]"}
            .bind(animated: fadeLabel.rx.animated.fade(тривалість:0.33).text)
            .disposed(by: disposeBag)
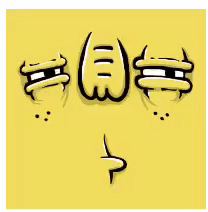
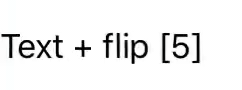
UILabel.text + flip:
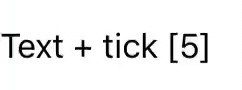
UILabel.text + tick:
UIImageView.image + fade, UIImageView.isHidden + fade, UIImageView.alpha + fade:
 imageTimer
            .bind(to: fadeImageView.rx.image)
            .disposed(by: disposeBag)
        timerHidden
            .bind(animated: fadeHiddenImageView.rx.animated.fade(duration:1.0).isHidden)
            .disposed(by: disposeBag)
        timerAlpha
            .bind(animated: fadeAlphaImageView.rx.animated.fade(duration:1.0).alpha)
            .disposed(by: disposeBag)

UIImageView.image + flip, UIImageView.isHidden + flip, UIImageView.alpha + flip:
UIImageView.image + tick, UIImageView.isHidden + tick, UIImageView.alpha + tick:

UIImageView.image + block, UIImageView.isHidden + block, UIImageView.alpha + block:
    imageTimer
            .bind(animated: blockImageView.rx.animated.animation(duration:0.5, animations:{[weak self]in
                self?.angle +=0.2
                self?.blockImageView.transform = CGAffineTransform(rotationAngle: self?.angle ?? 0)}).image )
            .disposed(by: disposeBag)
        timerHidden
            .bind(animated: blockHiddenImageView.rx.animated.animation(duration:0.5, animations:{[weak self]in
                self?.angle +=0.2
                self?.blockHiddenImageView.transform = CGAffineTransform(rotationAngle: self?.angle ?? 0)}).isHidden )
            .disposed(by: disposeBag)
      timerAlpha
            .bind(animated: blockAlphaImageView.rx.animated.animation(duration:0.5, animations:{[weak self]in
                self?.angle +=0.2
                self?.blockAlphaImageView.transform = CGAffineTransform(rotationAngle: self?.angle ?? 0)}).alpha )
            .disposed(by: disposeBag)
NSLayoutConstraint.constant:
   constraintTimer
            .bind(animated: leadingChangeConstraint.rx.animated.layout(duration:0.33).constant )
            .disposed(by: disposeBag)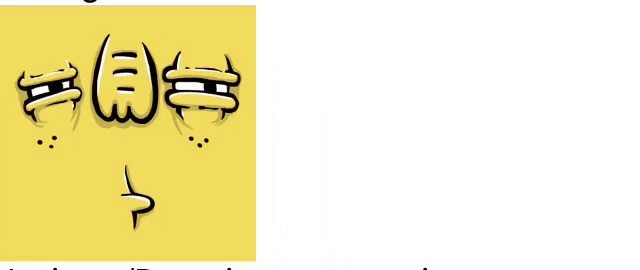
NSLayoutConstraint.isActive:
    isActiveTimer
            .bind(animated: leadingEnabledDisabledConstraint.rx.animated.layout(duration:0.33).isActive )
            .disposed(by: disposeBag)
UIButton.backgroundImage + fade:
   imageTimer
            .bind(animated: fadeButton.rx.animated.fade(duration:1.0).backgroundImage)
            .disposed(by: disposeBag)
        isActiveTimer
            .bind(to: fadeButton.rx.isEnabled)
            .disposed(by: disposeBag)
UIButton.backgroundImage + flip:
UIButton.backgroundImage + tick:

Додавання кастомної анімації
Як вже згадувалося раніше, кастомну анімацію можна додати до прив'язок, щоб відповідати візуальному стилю будь-якого застосунку.
Якщо нам потрібна анімація для властивості, яка не належить до стандартних, наприклад, шрифт UILabel, нам потрібно додати розширення для цієї властивості.
// Це ваш клас `UILabel`
extension AnimatedSink where Base: UILabel {// Це ім'я вашої властивості `font` та тип значення `UIFont`
    public var font: Binder<uifont> {
        let animation = self.type!return Binder(self.base){ label, font in
            animation.animate(view: label, binding:{
                label.font = font
            })}}}
</uifont>
Потім ми додаємо метод для нашої анімації:
// Це ваш клас `UIView`
extension AnimatedSink where Base: UIView {// Це ім'я вашої анімації `scale`
    public func scale(_ scale: CGFloat =2, duration: TimeInterval)-> AnimatedSink<base> {// використовуйте один з типів анімації та надайте блоки `setup` і `animation`
        let type = AnimationType<base>(type: RxAnimationType.spring(damping:1, velocity:0), duration: duration, setup:{ view in
            view.alpha =0
            view.transform = CGAffineTransform(scaleX: scale, y: scale)}, animations:{ view in
            view.alpha =1
            view.transform = CGAffineTransform.identity
        })

        // повертаємо AnimatedSinkreturn AnimatedSink<base>(base: self.base, type: type)}}
А тепер ми можемо використовувати цю анімацію в наших прив'язках. Давайте додамо нашу анімацію до UILabel, UIImageView, UIButton і подивимося, що сталося:
UILabel.text + кастомна:
 timer
            .map {"Text + custom [\($0)]"}
            .bind(animated: customLabel.rx.animated.scale(duration:0.33).text)
            .disposed(by: disposeBag)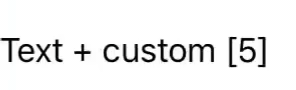
UIImageView.image + кастомна, UIImageView.isHidden + кастомна, UIImageView.alpha + кастомна:
        imageTimer
            .bind(animated: customImageView.rx.animated.scale(duration:1.0).image)
            .disposed(by: disposeBag)

UIButton.backgroundImage + кастомізація:
 imageTimer
            .bind(animated: customButton.rx.animated.scale(duration:1.0).backgroundImage)
            .disposed(by: disposeBag)
        isActiveTimer
            .bind(to: customButton.rx.isEnabled)
            .disposed(by: disposeBag)
Висновок
Вітаємо, ми створили невеликий застосунок з усіма стандартними анімаціями RxAnimated та додали також кастомні анімації. Тепер ви можете додавати анімації до прив'язок і створювати власні анімації за допомогою розширення бібліотеки RxAnimated.
Ви також ознайомилися зі списками стандартних анімацій та властивостями об'єктів для анімацій. RxAnimated — це досить зручна бібліотека для додавання анімацій до реактивного коду. Сподіваюся, стаття була корисною, і бажаю вам успіхів у ваших починаннях.
Повний демонстраційний проект можна знайти на Bitbucket