Until recently, the implementation of a payment method into your business software solution was a matter of your clients’ convenience and an important factor of success in e-commerce. Today, in the condition of the COVID-19 pandemic, contactless payments have also become an important aspect of safety for both buyers and sellers.
When speaking about business mobile apps, the statistic says you may lose up to 80% of your clients just because the payment service is inconvenient or untrustworthy.Just think of all those attempts to enter all data with the help of a touchscreen — not to mention multiple shifts and the fear of data leaks. In this situation, the Google Pay payment gateway integration is a win-win solution for all parties. Besides contactless payments with Android phones and wearable devices, GPAY guarantees secure online payments with quick and safe checkout in apps and websites. Although it’s simple to integrate Google Pay in the Android app, this solution is mighty and reveals access to hundreds of cards saved in Google account and opens up your business for more opportunities. What is important, it is free for both entrepreneurs and customers.
Business Advantages of Google Pay
Google Pay (previously known as Android Pay) enables mobile payments just in two steps. The users registered in Google, when it comes to payment, tap the button "Buy with GPAY", choose one of their payment cards, and submit. Shipping mode being attached once, they dispose of the necessity to enter the same contact data again and again. No wonder that such an easy payment method is really popular among the users: as of September 2018, the Google Pay app was downloaded more than 100 million times already. So, what are the business benefits? AirBnB, for instance, declared an 11 times increase in the number of online payments after the service integration. Google does not charge for the GPAY usage, so everything you get from integration is the growth in conversions and income. Let’s summarize:
- G-Pay is free,
- It’s easy-to-integrate,
- It reveals access to hundreds of cards,
- It skyrockets your conversions,
- It boosts your income.
Any e-commerce software solution dealing with retail or service provision can benefit much from Google Pay implementation in Android applications offered to the users.
Google Pay is available for all goods and services providers in the countries where the service is supported. To implement Google Pay in Android solution is a perfect way to connect the user with several dozens of payment systems all over the world through a unified interface. It is easily integrated into the Android app.
How? Read further to learn in detail.
Want a web app that does more?
Let's build a solution that's smart, sleek, and powerful.
Alina
Client Manager

Google Pay Integration
Import GPAY Service Library
The first thing you need to do for Google Pay integration in the Android app is to import a library. In the project file gradle, you need to add a dependency: implementation ’com.google.android.gms:play-services-wallet:$play_service_wallet_version’ where $play_service_wallet_version is a version of the library, we are going to use.
The current version is 18.0.0. The more detailed instruction for the library data and information about Google Pay Services libraries can be found here.
Initialize the Payment Client
Assuming the product or the service has already been formed and everything is ready for it to pass into your ownership. What we still need is adjusting the purchase process itself. For this, let’s initialize the payment client:
private lateinit var mPaymentsClient: PaymentsClient

private lateinit var mPaymentsClient: PaymentsClient

mPaymentsClient = GooglePayUtil.createPaymentsClient(this)

fun createPaymentsClient(activity: Activity): PaymentsClient {
val walletOptions = Wallet.WalletOptions.Builder()
.setEnvironment(PAYMENTS_ENVIRONMENT)
.build()return Wallet.getPaymentsClient(activity, walletOptions)}For PAYMENTS_ENVIRONMENT, we will specify the environment type WalletConstants.ENVIRONMENT_TEST.
Check the Possibility of Purchasing
Next, I propose first to check the possibility of purchasing with Google Pay:GooglePayUtil.isReadyToPay(mPaymentsClient).addOnCompleteListener{ task ->try{ setGooglePayButtonAvailable(task.getResult(ApiException::class.java))}catch(exception: ApiException){ mGooglePayStatusText.text="Payment status: Error init" Log.d("isReadyToPay failed", exception.statusCode.toString())}} fun isReadyToPay(client: PaymentsClient): Task<boolean>{ val request = IsReadyToPayRequest.newBuilder()for(allowedMethod in SUPPORTED_METHODS){ request.addAllowedPaymentMethod(allowedMethod)}return client.isReadyToPay(request.build())}</boolean>
Display or Hide the Button
Depending upon the result, we need either to display or to hide the button:private fun setGooglePayButtonAvailable(available:Boolean){if(available){ mGooglePayStatusText.text="Payment status: Supported" mGooglePayButton.visibility=View.VISIBLE}else{ mGooglePayStatusText.text="Payment status: Not supported"}}
Specify the Payment Methods
Payment methods are specified in advance:
private val SUPPORTED_METHODS =Arrays.asList(
WalletConstants.PAYMENT_METHOD_CARD,
WalletConstants.PAYMENT_METHOD_TOKENIZED_CARD)
Google Pay In the Android App: Further Steps of Integration
We have gone through all preparatory stages related to our payment systems usage. Now we have come to the most complicated stage, payment committing:
mGooglePayButton.setOnClickListener{
   requestPayment()}
An important note: most of payment systems use the minimal possible currency value. Consequently, in the case of a kopeck or penny, for example, when indicating the write-off sum equal 17852, we confirm that we want to write off 178.52.
The currency type:
private fun requestPayment(){
   mGooglePayButton.isClickable=false

   val price = GooglePayUtil.microsToString(17852)
   val transaction = GooglePayUtil.createTransaction(price)
   val request = GooglePayUtil.createPaymentDataRequest(transaction)
   val futurePaymentData = mPaymentsClient.loadPaymentData(request)

   AutoResolveHelper.resolveTask(futurePaymentData,this, LOAD_PAYMENT_DATA_REQUEST_CODE)}
Next, prepare the transaction. Don’t forget to indicate the currency type:
fun createTransaction(price:String): TransactionInfo {return TransactionInfo.newBuilder()
       .setTotalPriceStatus(WalletConstants.TOTAL_PRICE_STATUS_FINAL)
       .setTotalPrice(price)
       .setCurrencyCode("USD")
       .build()}
Form the request. Right away add the specifications for the merchant and the website link:
fun createPaymentDataRequest(transactionInfo: TransactionInfo): PaymentDataRequest {
   val paramsBuilder = PaymentMethodTokenizationParameters.newBuilder()
       .setPaymentMethodTokenizationType(
           WalletConstants.PAYMENT_METHOD_TOKENIZATION_TYPE_PAYMENT_GATEWAY)
       .addParameter("gateway", “http://www.example.com”)
       .addParameter("gatewayMerchantId","Example Merchant Name")return createPaymentDataRequest(transactionInfo, paramsBuilder.build())}
Next, the request itself. Here, specify all the necessary fields and ordering parameters. For example, we may specify if we need to request a phone number, an e-mail, and whether we need a delivery option at all. Here and now, we also specify countries where the goods can be delivered, payment options, and payment systems (VISA, MASTERCARD):
private fun createPaymentDataRequest(
   transactionInfo: TransactionInfo,
   params: PaymentMethodTokenizationParameters
): PaymentDataRequest {

   return PaymentDataRequest.newBuilder()
       .setPhoneNumberRequired(false)
       .setEmailRequired(true)
       .setShippingAddressRequired(true)
       .setShippingAddressRequirements(
           ShippingAddressRequirements.newBuilder()
               .addAllowedCountryCodes(SHIPPING_SUPPORTED_COUNTRIES)
               .build())
       .setTransactionInfo(transactionInfo)
       .addAllowedPaymentMethods(SUPPORTED_METHODS)
       .setCardRequirements(
           CardRequirements.newBuilder()
               .addAllowedCardNetworks(SUPPORTED_NETWORKS)
               .setAllowPrepaidCards(true)
               .setBillingAddressFormat(WalletConstants.BILLING_ADDRESS_FORMAT_FULL)
               .build())
       .setPaymentMethodTokenizationParameters(params)
       .setUiRequired(true)
       .build()}

private val SHIPPING_SUPPORTED_COUNTRIES = Arrays.asList("UA, US, DE, GB")

private val SUPPORTED_NETWORKS = Arrays.asList(
   WalletConstants.CARD_NETWORK_VISA,
   WalletConstants.CARD_NETWORK_MASTERCARD)
So, the request is formed. Next, we need to process the result of this request:
override fun onActivityResult(requestCode: Int, resultCode: Int, data: Intent?){
   when (requestCode){
       LOAD_PAYMENT_DATA_REQUEST_CODE ->{
           when (resultCode){
               Activity.RESULT_OK->{
                   data?.let{
                       onPaymentSuccess(PaymentData.getFromIntent(data))}}
               Activity.RESULT_CANCELED->{}
               AutoResolveHelper.RESULT_ERROR->{
                   onError(AutoResolveHelper.getStatusFromIntent(data)?.statusCode)}}
           mGooglePayButton.isClickable=true}}}
Then goes the transaction processing. Here, a lot of various logic can be added, including screen shifts, congratulations of just service-based data, but in our version, we will just check the result and show it. This is just a trial version, so, we will not dwell into the business logic:
private fun onPaymentSuccess(paymentData: PaymentData?){
     Toast.makeText(this, “Payment Success”, Toast.LENGTH_LONG).show()}

private fun onError(statusCode: Int?){
   Log.w("loadPaymentData failed",String.format("Error code: %d", statusCode))}
Android Google Pay Integration Outcome: What the User Sees
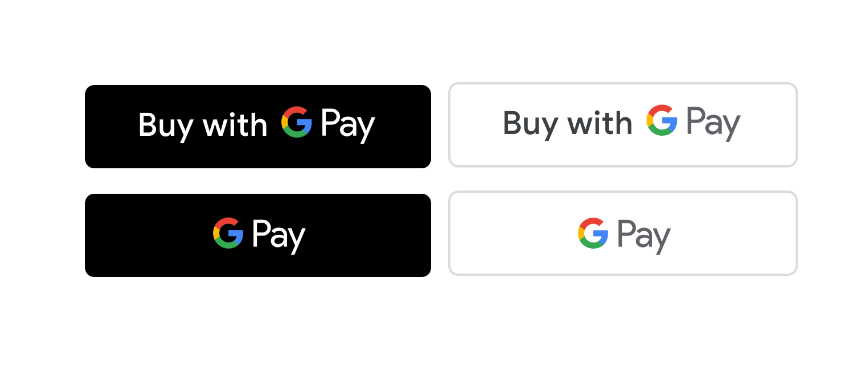
As a result, the users at the checkout stage will see the Google Pay button:

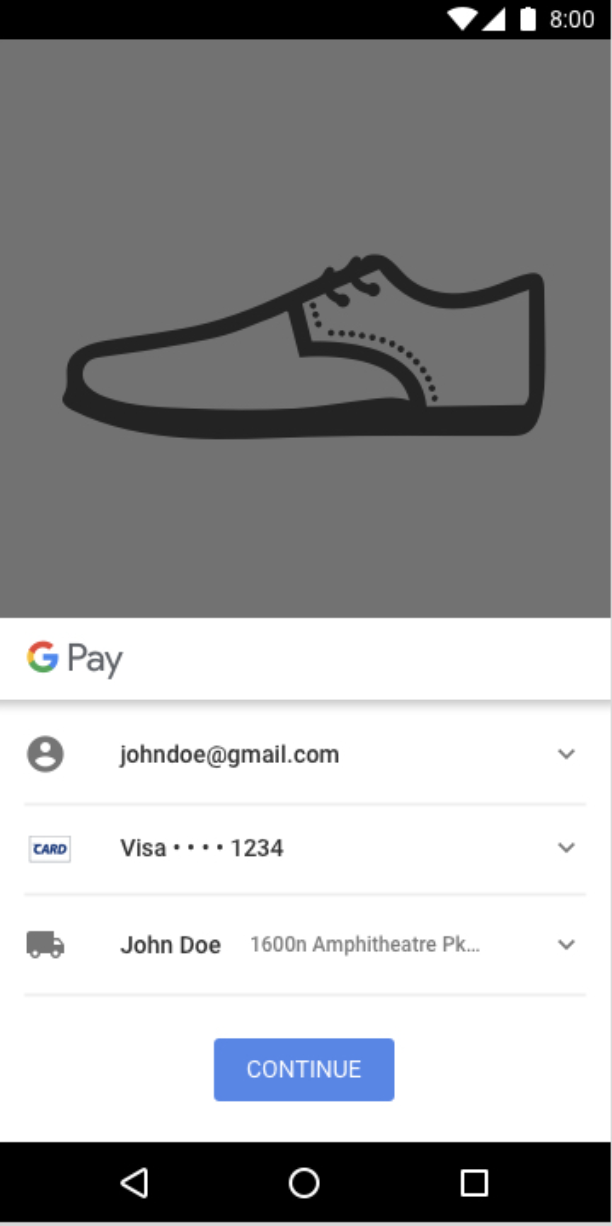
After tapping it, they will see the checkout form:

Google Pay Update 2024
Time flies and to keep this small Android Google Pay integration tutorial up-to-date we decided to refresh it. Google has made a great tutorial already, and I just try to explain some points from the practical point of view.
Library versions
Firstly, over time, the version of the payment plug-in library has been upgraded.
com.google.android.gms:play-services-wallet:$play_service_wallet_version
The current version of the library is 19.3.0. The changes mainly affected security and bank interaction protocols.
Payment providers
As to the banks and payment systems that work with Google Pay, the up-to-date list can be found here. The payments can be realized only through the enumerated payment providers. By the way, the list is quite extensive and the most popular payment systems support GPAY payments as well. Here you can find global payment systems such as BrainTree, Stripe, Square. There are also several options for the Ukrainian markets: LiqPay, Portmone, WayForPay, iPay.
Display
To be able to use payments, you should also study the design guides. It’s quite possible that during a review you get a blocked payment before all problems are eliminated. All the guide requirements are here, they are not complicated and more than logical.
Usage
The first step to making successful payments is to register your business in the console.
Then, you need to configure the payment client itself. To do this, you need to form a basic request at least, where the minimum version of API payment will be indicated. This part should be used during every request.
private val baseRequest = JSONObject().apply{
	put("apiVersion", 2)
	put("apiVersionMinor", 0)}
We immediately form a request to tokenize your provider.
private fun gatewayTokenizationSpecification(): JSONObject {return JSONObject().apply{
	put("type", "PAYMENT_GATEWAY")
	put("parameters", JSONObject(mapOf("gateway" to "example",
	"gatewayMerchantId" to "exampleGatewayMerchantId")))}}
Next, we indicate what types of cards we will work with and the possible authentication options.
private val allowedCardNetworks = JSONArray(listOf("AMEX",
	"DISCOVER",
	"INTERAC",
	"JCB",
	"MASTERCARD",
	"VISA"))

private val allowedCardAuthMethods = JSONArray(listOf("PAN_ONLY",
	"CRYPTOGRAM_3DS"))
As for authorization, there is an option to specify just PAN_ONLY which will allow you to use GPAY only with those cards that are already linked to your account. Further, there is nothing difficult. It remains only to create the client for payment (PaymentClient), check the possibility of payment using GPAY, and display the button like it was described above. All code examples are provided on GitHub, where you can find an almost complete sample from Google itself.
Our Experience
Let’s speak about sad things a little. Based on our experience, many companies that need to develop a mobile application have their own flow of work with money already. It means that the companies have open bank accounts and established systems of reporting, so why do they need all this?
In such cases, there is often a strict requirement from the business to use local payment providers without opening additional accounts and registering companies in consoles. It would be nice to do it, but it is almost impossible to realize it in a native medium. Most of the local payment systems that we had dealt with simply failed to have a working SDK, or had it awfully outdated.
The way out can be very simple. Although there is no native SDK, you can always use web plugins for payments. It may look not so beautiful, but it works!
In most cases, we form a page with a ready-made payment plugin from the bank, in which the client is served, and display it on the built-in browser page. It should also be noted that using an ordinary WebView will not do.
Until recently, it was possible to create a simple WebClient, where you could write the logic of redirects, and thus it was possible to handle callbacks from the payment system, thereby implementing further application logic. However, recently they’ve pulled the plug on this because а the poor security. Although most banking widgets will not see any changes in operation, Google Pay will not launch. The button on the widget will appear and will even be clickable, but nothing will happen after a click.
The current implementation is CustomTabs usage. It is necessary to generate the URL for the web plugin in the same way, but the web client processing should not be manual, you should give it to the chrome engine processor.
Apparently, the cons are obvious: we can not influence what is going on inside. We can no longer handle redirects and continue the main flow of the application after payment. In such an implementation, you need to trust the user and request the status of payment for the order from the server.
Let’s Sum It Up
Google Pay is a handy and safe payment service for the mobile app with the possibility of integration of numerous payment systems. It makes purchases easier for clients and boosts online sales for the merchants. With the help of the algorithm described above, you will easily add Google Pay to the Android app you develop for your business and besides now you have some idea how to cope with difficulties in its integration.
However, if programming is not your professional field, contact Stfalcon.com — and our specialists will quickly and qualitatively develop and implement any functionality for your mobile app.


