

Creating a mobile app is more than just writing code. With thousands of new apps released on Google Play every day, only those that truly meet user needs stand out. Whether you’re building a business tool or an on-demand delivery app, success depends on how well your app serves its audience.
In this post, we’ll explore the core elements that make an app not only functional but also valuable. We will walk through the app-building journey from start to finish. Let's learn how to create an Android app in just five steps.
What Makes a Successful Mobile App
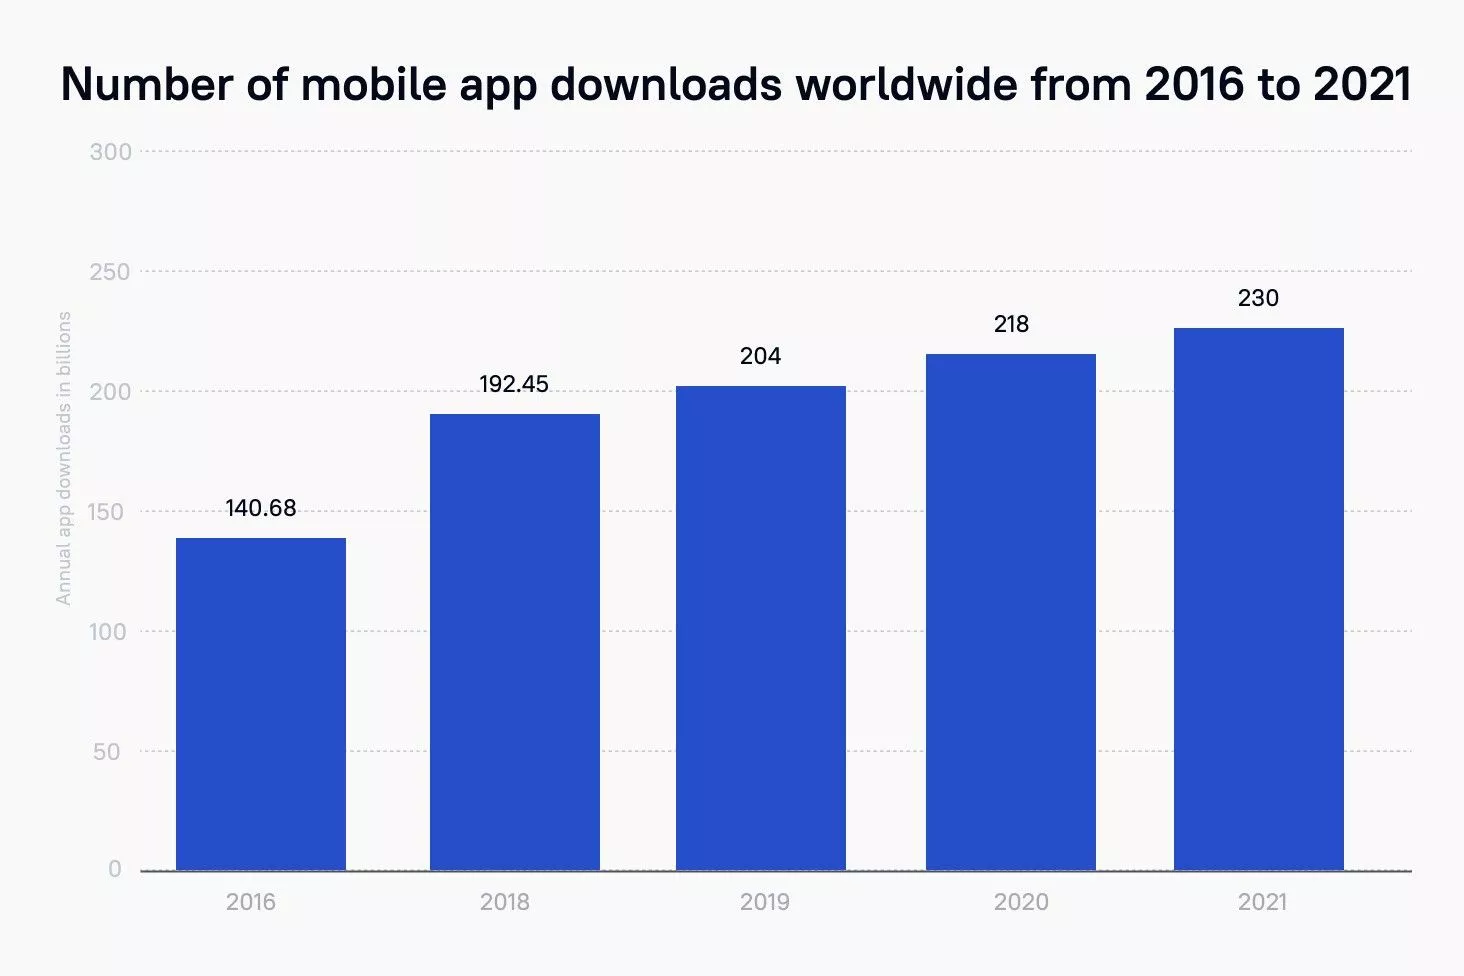
Every day on Google Play 6,140 mobile apps are released. Statistics say one thing: it's time to create a custom app. If you are seriously thinking about developing an app, our blog post will help you.
It doesn't matter what you plan to create – a business tool or a student startup with a wide audience. An end user, for whom an app is being developed, appreciates primarily the quality and benefits that he/she will receive from the installation. The quality of a program directly determines its demand, the number of downloads, positive reviews, and high ratings. Let's look at what should be improved at the development stage.
App Availability and Performance
First, the information and functionality provided in the app should be user-friendly. The application should be simple and understandable for ordinary users, which is the cornerstone of quality user interface design services. By installing the app, they have to get a simple, functional, and easy-to-learn program.
User Interface and App Design
This criterion determines how intuitive the app interface is. A user must have the possibility to easily understand how the application works and how to perform this or that action.
Core Features of a Successful App
No matter how good the design, and user-friendly interface are, the app functionality plays a key role in its evaluation. When evaluating the options the app offer, everyone is looking for answers to such questions:
- Is the product easy to use?
- Are all the features I need to be included?
- Will they answer my questions?
On average, the app evaluation takes no more than 10 minutes, so the functionality should be complete and noticeable without much effort.
Want a web app that does more?
Let's build a solution that's smart, sleek, and powerful.
Alina
Client Manager

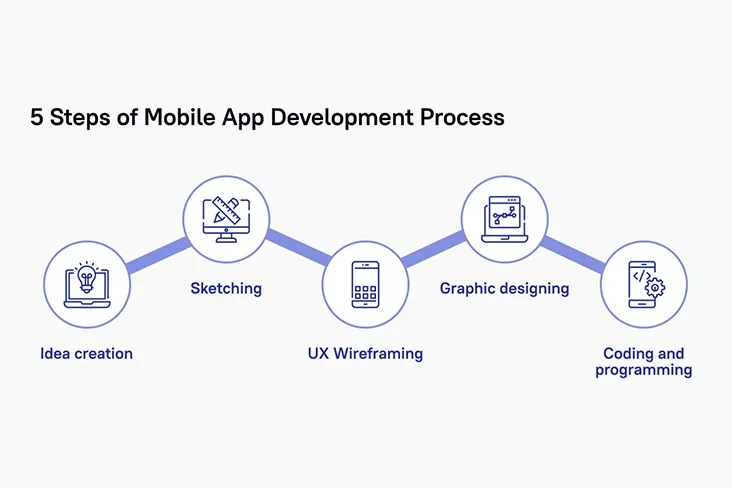
5 Steps to Make an App from Idea to Launch
So, let's look at how to create an Android app in 5 steps.
Define Your App Idea
First, you need to come up with an idea for a mobile app. In Stfalcon, we ask the client to provide us with a technical task, and if it isn’t available, we send a brief for the development of a mobile application. The brief helps to prioritize, and identify the goals and objectives of the application.
Depending on the type and tasks of the application, different approaches are used when developing: Waterfall and Agile. In these two the process of creating a mobile application includes the same stages – idea creation, analytics, design, development, testing, bug fixing, release, and post-release app support. The difference is in the methodologies. Waterfall Model means that the product is built at once. In Agile, an app is developed in iterations, each of which combines all of the above development stages.
Analytics isn’t always part of the mobile app development process. It happens that clients independently perform a business analysis of the application, or come with a ready-made list of requirements. But those apps that have passed this stage with the developer company win – it is analytics that helps businesses and developers achieve a common vision.
Plan the App Structure
The application design layout can be made in any tool convenient for you and your team. As a rule, this is Sketch, XD, Figma, Photoshop, or Illustrator.
Whatever you're working in, double-check that everything inside the layout is in order, namely:
- Uses pt as units.
- Uses an 8x8 pt grid for Android and 10x10 pt for iOS and has snapping enabled (not pixel).
- All artboards are created for base ppi (in @1x or mdpi).
- All artboards, groups and, if possible, all layers are adequately named ("Rectangle copy 59" or "Group 12" shouldn’t be).
- All icons and illustrations are marked as "exportable" and have clear names.
- There are no empty or unfinished screens or elements.
It's just quality control. If the layout is made incorrectly, then this will somehow lead to a conflict or edits. Better to do well right away.
Create UX Wireframes
The main task of developers is to create a convenient ecosystem with perfect UX or wireframing.
At the stage of UX development, the designer must think through the entire user journey from the initial dating screens to the completion of targeted actions, which can be several in the application. As a rule, the user journey is a branching tree of possibilities with different functionality: subscribing to an application, contacting support, reading text, paying for goods, and so on. And each “branch” should be well thought out already at the prototype stage.
In interface design, there are several important details that the designer and the customer should be aware of:
- the main application controls should be at the bottom; the upper left corner in the App design is used minimally and only for certain purposes, for example, the “Back” button, since it is difficult to reach it;
- control is not necessarily carried out only with buttons; in the application, the user can swipe or hold certain controls;
- applications can be scrolled both from bottom to top and from right to left. If you use a side scroll, then you should give the user a hint.
An important stage of UX design is testing the usability of the finished interface. It includes the evaluation of the prototype on several parameters:
- efficiency – achievement of tasks by the user;
- effectiveness – the time spent on achieving the goal;
- satisfaction with the quality of service and user experience.
The easiest way to conduct test sessions would be to create clickable prototypes in Figma and record the process of using the service with subsequent feedback. However, there are more advanced services that broadcast the process of user interaction with the application in real time, for example, Userlytics, TryMyUI, and UserTesting.
Design the User Interface
After you have designed the interface, you can move on to the visual component. The main task at this stage is to bring the design to a single Style Guide.
For creating an app for Android, it is desirable to use no more than 5 - 6 types of the same font (of different sizes, colors, and thicknesses) and 4 - 5 colors. It is also worth considering the transition animation from one screen to another: disappearance, shift, preloaded, etc. When choosing colors, it is also worth considering that the iPhone color palette is usually better than the palette of Android devices, which means you need to abandon dirty and adjacent colors.
Develop and Test the App
When there is a detailed technical task, the design is ready and the prototype of the mobile application is approved, development begins. The Android development team embodies the end design in the code – we prescribe all the styles and UI elements with which the application user interacts. What is the process of creating a program for Android? Let's pay attention to a few points:
- Kotlin/Java files – they describe the logic of the mobile application - the functions that you expect from the program. Previously, Java was the main development language for Android, but Kotlin has replaced it, but you can still use both languages even within the same project.
- XML files – a visible interface is created in them.
- When the program is written, it needs to be compiled into a single file. There are 2 project build options, APK (.apk) and AAB (.aab). AAB is uploaded as an application on Google Play, and the APK is immediately launched on the device to test the mobile application. For assembly, and compilation, there are special technical tools.
All utilities and files that help to create and control the program are collected in the IDE (Mobile Development Integrated Environment). Through this program, the code is edited, compiled, and launched.
Note: Eclipse used to be a typical developer IDE. Today, the most popular application development environment is a product from Google – Android Studio. It is developed based on IntelliJ IDEA (produced by JetBrains).
During Android development, it is crucial to connect with the designer. The designer will check the implementation of the application screenshots: whether all the styles match, what is the aspect ratio, how the corners are rounded, etc.
Different Ways to Build an App
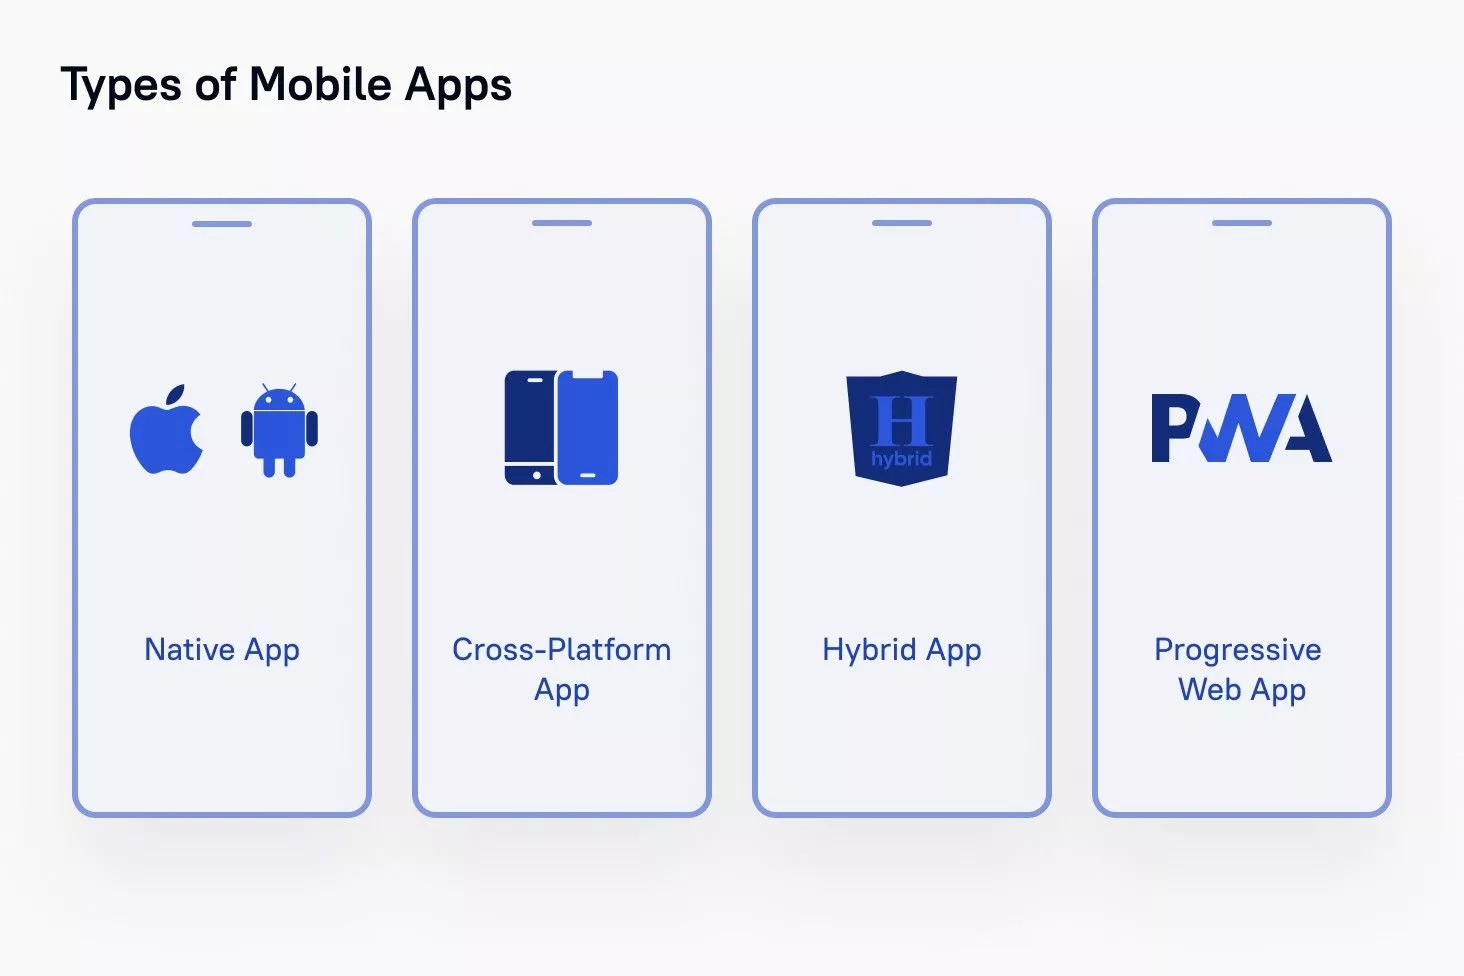
There are four development methods for building mobile applications:
- Native Mobile Applications
- Cross-Platform Native Mobile Applications
- Hybrid Mobile Applications
-Progressive Web Applications
When you choose the right development method for your project, you should consider the desired user experience, development budget, time frames, computing resources, features required by the app, and resources for maintaining the app.
- Native mobile applications are the most common and expensive type to develop, as they are created separately for each OS (iOS, Android, or others). When we talk about mobile applications, we most often mean native ones.
- Cross-Platform Native Mobile Application is a method that allows you to create a single mobile application that runs flawlessly on several operating systems. In cross-platform applications, some of the source code can be shared. This means that coders can build and deploy mobile assets that work on both Android and iOS without recoding them for each platform.
- Hybrid applications are web applications that look like native ones and have their characteristics. In particular, the desktop icons of the user's mobile device, good performance, and the ability to work offline.
- Progressive web applications are native applications inside the browser. Applications of this class are supported by all major browsers, however, the prevalence of PWA technologies, despite their obvious “advantages”, is still very low.
There are many things to consider when making your app, such as who will be the users, what problems the app is going to solve for its users, what strategies competitors are using to market their mobile apps, and so on. The absence of any of these factors at the design stage can create problems.
Android development is not easy. Many stages of development for Android may intersect with each other or run in parallel.
Developing an Android app requires the interaction of more than one specialist. At a minimum, you need a designer, developer, and tester. For specialists, experience in commercial development, and knowledge of programming languages. When developing for Android we use Java and Kotlin. In cross-platform solutions, we work with Flutter.
You will also need analytics at the preparation stage to develop a high-quality and in-demand application. At Stfalcon, we can help you with all stages of mobile development, and you will get a viable product, just reach us by email or phone.
About the Author
Andrii is an Android developer with more than 6 years of experience in building, integrating, and maintaining Android apps. He has a strong background in the development of enterprise-level software and applications. As a writer, he wrote numerous articles on app development. Currently, he is working with the Stfalcon team.